Pressure Washer Leaking from Hose Connection: Expert Troubleshooting and Fixes
Diagnose and fix a pressure washer leaking from the hose connection with practical steps, safety tips, and maintenance guidance from Pressure Wash Lab to keep seals tight.

Start by shutting off the water supply and releasing pressure. Inspect the hose connection for a worn washer or a loose fitting, then replace the washer or reseat the fitting. Re-tighten to a snug fit, but do not over-tighten. If leakage persists, inspect the hose and inlet threads for damage and replace as needed.
Why hose connections leak in pressure washers
A pressure washer's hose connection is one of the most common leak points. When the hose meets the unit, a tiny flaw can spray water under high pressure. According to Pressure Wash Lab, most hose-leak issues originate at the connection due to a worn seal or loose fitting. This makes targeted repairs quicker and cheaper than replacing the entire pump. Understanding the failure modes helps DIYers diagnose quickly and stay safe when the unit is pressurized. The keyword here is resilience: a secure seal at the hose connection is what keeps water where it belongs and away from your feet and electrical outlets.
If you notice the problem, remember: acting promptly reduces water waste and prevents corrosion on metal threads, which can compound the leak over time.
Common causes at the hose connection
Leaks at the hose connection usually come from a few repeat offenders. The most frequent culprits are a worn or damaged washer inside the coupling, or a loose fitting that has worked loose from vibration during use. Cross-threaded inlet or outlet threads also create a poor seal, as can a damaged hose end or cracked connector. Over-tightening can crush the seal or threads and trigger leaks rather than fixing them. Pressure Wash Lab Analysis, 2026, notes that the washer and threading fault are the leading causes for leaks at hose connections. By knowing these causes, you can quickly target the right repair without guesswork.
Safety-first: depressurize and prepare
Before touching any fittings, shut off the water supply and pull the trigger on the spray wand to release pressure. If your unit has a power switch, unplug it to eliminate any chance of accidental activation. Wear eye protection and gloves to guard against spray and detergents. Work on a dry, stable surface and keep the area free of bystanders. A calm, methodical approach reduces the risk of personal injury and prevents inadvertent damage to fittings and hoses.
Visual inspection checklist
- Look for signs of water streaking at the hose join, which indicates an active leak path.
- Inspect the gasket or washer inside the coupling; replace if worn or torn.
- Check the hose end for cracks, bulges, or deformities.
- Examine the threaded inlet/outlet for damage, corrosion, or debris that can hinder sealing.
- Ensure quick-connects and clamps are intact and seated properly.
- Clean the exterior threads and seating surface to ensure a clean seal on reassembly.
How to replace the washer and seals
- Disconnect the hose from the machine and wand; relieve any remaining pressure.
- Remove the coupling to access the internal washer. Inspect the seating surface for nicks or scratches.
- Install a new washer of the correct size; ensure it sits flat and clean.
- Reassemble the coupling and hand-tighten first, then apply a light wrench turn to snug the connection.
- Reconnect the hose and perform a controlled, low-pressure test to verify the seal.
Tip: Always carry a spare kit of standard replacement washers in case the size needs swapping during service.
Re-seating and tightening: best practices
Proper tightening is key. Start by hand-tightening, then give the connection a small additional turn with a wrench—enough to stop any drips, but not so much that you crush the washer. If the leak remains, back off slightly and reseat the washer and seating surface. Use a clean rag to wipe away any residual water and inspect for drips over a few minutes of gentle operation. Excessive torque can permanently deform threads, making leaks worse instead of better.
How to inspect and replace the hose
If the hose itself shows signs of wear—cracks, bulges, or soft spots—replace it with a compatible model. When choosing a replacement, match the end connectors and ensure the clamps or couplers are compatible with your machine. After installation, test at low pressure and gradually increase to normal operation while checking for leaks along the entire length of the hose. A damaged hose is a common secondary cause of persistent leaks, even after seals are replaced.
When to replace the entire hose or unit
If leaks persist after replacing washers, tightening fittings, and inspecting the hose, the problem may be deeper than a simple seal. Stripped threads, severe damage to the coupling, or cracked hoses often require replacing the hose or, in some cases, the entire unit if the pump or manifold has sustained damage. When in doubt, consider professional inspection to avoid misdiagnosis and to ensure safety with high-pressure water.
Preventive maintenance to avoid future leaks
- Schedule regular inspections of hose connections every 3–6 months, especially after heavy use or winter storage.
- Replace washers at the first sign of wear or cracking to maintain a good seal.
- Store your pressure washer with hoses detached to relieve continuous stress on the connection.
- Use the manufacturer’s recommended hoses and fittings to ensure compatibility and optimal sealing. Keeping the area around the connection clean helps detect small drips early.
Steps
Estimated time: 30-60 minutes
- 1
Power down and depressurize
Shut off the water supply and trigger the wand to release any remaining pressure. If applicable, unplug the unit. Safety first ensures you don’t get sprayed during disassembly.
Tip: Never work on a hot unit; allow it to cool for a few minutes before touching fittings. - 2
Inspect the hose connection area
Look for wet streaks, a damaged washer, or loose fittings. Clean threads and seating surfaces to reveal clean, dry metal for accurate inspection.
Tip: Use a bright light or flashlight to catch fine cracks in the hose end. - 3
Replace the washer and reseat the coupling
Install a new washer of the correct size, seat it flat, and reassemble the coupling. Hand-tighten first, then snug with a wrench.
Tip: Keep a small cylinder of spare washers labeled by size. - 4
Tighten and test
Reconnect the hose and perform a low-pressure test to verify the seal. If drips appear, tighten a touch more and re-test.
Tip: If you’re unsure about torque, aim for a snug fit + ¼ turn; avoid overtightening. - 5
Check the hose and threads
Inspect the hose end and inlet threads for damage. Replace the hose if the connection shows wear or if threads are stripped.
Tip: Damaged threads require replacement to avoid future leaks. - 6
Document and maintain
Record the date of the service and parts replaced. Inspect connections routinely and replace washers proactively before leaks start.
Tip: Keep a maintenance log for quick future reference.
Diagnosis: Water leaking from the hose connection during operation
Possible Causes
- highWorn or damaged washer inside the coupling
- highLoose or cross-threaded fittings
- mediumDamaged hose end or inlet threads
- lowOver-tightened connections that crush seals
Fixes
- easyReplace the internal washer and reseat the coupling to the correct torque (hand-tight, then a light snug).
- easyTighten fittings to snug, clean threads, and replace damaged hardware if cross-threaded.
- easyInspect hose ends for cracks; replace the hose if any damage is found.
- mediumIf threads are damaged beyond repair, replace the inlet/fittings or consult a professional.
Quick Answers
What causes a pressure washer to leak at the hose connection?
Common causes are a worn washer, loose or cross-threaded fittings, or damage to the hose end or threads. Inspect each part to identify the source before replacing.
Leaks at the hose connection are usually caused by a worn washer or loose fittings; inspect and replace as needed.
Can I reuse the washer or seal in the hose connection?
In most cases, you should replace the washer with a new one of the correct size. Reusing a worn or damaged washer will likely lead to recurring leaks.
It's best to replace the washer with a new one to ensure a reliable seal.
Is it safe to operate the pressure washer with a small leak?
No. Even a small leak can worsen or cause water damage and electrical hazards. Stop and repair before continuing use.
No—stop and fix the leak to avoid bigger problems.
Should I use thread sealant or plumbers tape on the hose connection?
Check the manufacturer’s guidance. Most hoses rely on a gasket or washer; sealants are usually not recommended unless specified.
Only use sealants if the manufacturer says it's okay; otherwise rely on the washer and proper tightness.
When should I replace the entire hose?
If the hose shows multiple cracks, bulges, or swelling, replace it. Persistent leaks after fixes also indicate hose wear.
Replace the hose if it’s visibly damaged or leaks persist after fixes.
What torque should I use when tightening the connection?
Tighten by hand until snug, then give a light quarter-turn with a wrench. Avoid overtightening to prevent damage.
Tighten until snug, then a light extra turn; don’t overtighten.
Watch Video
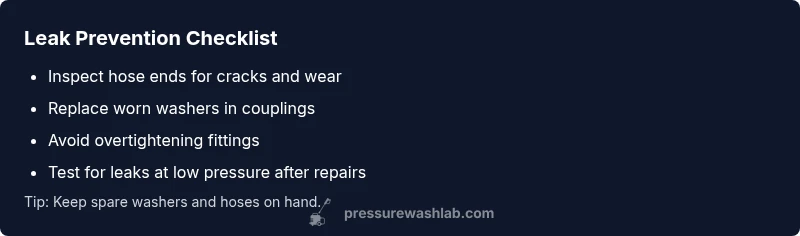
Key Takeaways
- Shut off and depressurize before starting repairs.
- Worn washers and loose fittings are the most common culprits.
- Replace washers and inspect threads to restore a proper seal.
- Test at low pressure and then at full operation to confirm the fix.
- Regular maintenance prevents future hose-connection leaks.