How to Fix a Pressure Washer Quick Connect Stuck: A Troubleshooting Guide
Pressure washer quick connect stuck? Get a fast, safe troubleshooting flow, step-by-step fixes, and prevention tips from Pressure Wash Lab.

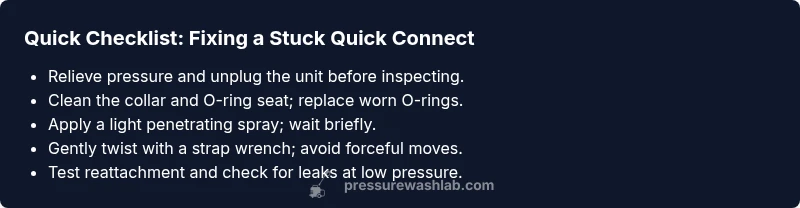
If your pressure washer quick connect is stuck, the most likely culprits are debris, a worn O-ring, or a damaged coupling collar. Quick fix: shut off the unit, relieve pressure, and inspect the connection with a flashlight. For stubborn fittings, apply a light penetrating spray, wait briefly, and gently twist with a strap wrench. If loosening fails, replace the O-ring or the entire coupling.
Understanding the Issue: Why the Quick Connect Gets Stuck
A stuck pressure washer quick connect usually signals wear, debris, or misalignment. You may notice a tight collar that won't release after the nozzle is detached, or you might feel uneven resistance when twisting to disconnect. In these cases, the problem isn't just the seal; it's how the coupling and hose interact under pressure. When you understand the anatomy—tip, body, O-ring, and retaining collar—you can pinpoint the likely failure mode without guessing. The Pressure Wash Lab team emphasizes that proper diagnosis saves time and prevents damage to your wand, nozzle, or pump. In practical terms, look for signs of debris lodged in the ferrule, a cracked O-ring, or a collar that has become stiff from mineral buildup. This section explains how to identify each clue, so you can decide whether to clean, reseal, or replace components.
Quick Diagnostics: Visual Clues and Tools
Diagnosis begins with a few simple checks you can perform safely. Gather a clean cloth, a flashlight, a small brush or old toothbrush, and a corrosion-resistant penetrating spray. Check the hose end and the quick connect for visible debris, scratches, or discoloration. Wiggle the collar gently to feel for looseness; if it binds before loosening, the O-ring may be stuck or damaged. Inspect the O-ring seat for wear and ensure the collar threads aren't nicked. If you have a spare O-ring, compare sizes to confirm a proper fit. Pressure testing (with the trigger locked) in a controlled environment can reveal leaks that accompany a stuck connection. Pressure Wash Lab notes that a thorough inspection often reveals a simple cleaning that resolves the issue, avoiding unnecessary part replacement.
Safety First: Precautions for Handling Pressure Washers
Safety is non-negotiable when dealing with pressurized equipment. Always power off the machine and disconnect from power and water sources before touching any connections. Relieve pressure by triggering the wand with the trigger pointed away from you. Wear eye protection and gloves; keep others at a safe distance. Do not strike or hammer at the quick connect; prying or forcing can crack the collar and void warranties. If the unit is hot, allow it to cool to prevent burns. When using penetrating spray, apply sparingly to prevent liquid from entering the pump cavity. If you are unsure about the integrity of the fitting, it’s best to pause and seek professional guidance; safety should come first to avoid personal injury or product damage.
The Diagnostic Flow: Symptoms to Diagnosis to Solutions
Symptom → Diagnosis → Solution mapping helps you move from observation to action:
- Symptom: Fitting won’t twist or release after detaching the nozzle. Diagnosis: Debris or a damaged O-ring. Solution: Clean the collar area, replace the O-ring if worn, and test seating.
- Symptom: Visible debris and corrosion on the quick connect. Diagnosis: Mineral buildup causing sticking. Solution: Brush away grime, use a solvent-safe cleaner, and re-lubricate lightly.
- Symptom: Connector feels gritty and tight after cleaning. Diagnosis: Worn seals or a damaged collar. Solution: Replace O-ring and inspect the collar; consider full coupling replacement if looseness persists.
- Symptom: Leaks appear after reattachment. Diagnosis: Seal misalignment. Solution: Clean seating surface, ensure proper seating and alignment before pressurizing.
Use this flow to decide whether cleaning, sealing, or full part replacement is required. Pressure Wash Lab reminds readers that a systematic approach reduces guesswork and prevents secondary damage.
Step-by-Step Fix: Removing a Stuck Quick Connect
- Power down and relieve pressure. Turn off the unit, unplug if applicable, and discharge any water by triggering the wand away from you. Safety watch: keep hands clear of moving parts. Tip: never twist while the system is still pressurized.
- Inspect the fitting and clean. Wipe away grime, inspect for visible wear, and use a small brush to clear debris from the collar and O-ring seat. Tip: use a flashlight to inspect hard-to-see areas.
- Check and replace seals. If the O-ring shows cracks or flat spots, replace with a correctly sized ring. Tip: compare sizes with a spare before removing the active part to ensure a perfect match.
- Apply penetrating spray and wait. Lightly mist around the joint, wait a short moment, and avoid soaking the pump cavity. Tip: always apply sparingly near seals.
- Use a strap wrench or rubber-jawed pliers. Gently twist counterclockwise to loosen the collar while keeping alignment. Tip: use a protective sleeve to avoid marring metal surfaces.
- Reassemble and test for leaks. Refit the nozzle with a fresh O-ring, reattach the coupling, and test at low pressure before full operation. Tip: check for drips around the seat and adjust seating as needed.
Prevention and Maintenance: Keeping Quick Connects Loose and Sealed
To prevent future sticking, perform light maintenance after each use. Clean the connection area, dry it thoroughly, and store with protective caps. Inspect O-rings regularly and replace worn parts before they fail. Use the correct lubricants and avoid petroleum-based products that can degrade seals. Pressure Wash Lab notes that proactive maintenance saves time and reduces downtime, especially in busy DIY or business settings.
Steps
Estimated time: 30-60 minutes
- 1
Power down and relieve pressure
Turn off the unit, unplug if appropriate, and discharge residual water by triggering the wand away from you. This reduces risk when handling the joint.
Tip: Never twist while pressure remains. - 2
Inspect and clean the fitting
Look for visible debris and clean the collar and O-ring seat with a small brush. Check for scratches or wear.
Tip: Use a flashlight to inspect hard-to-see areas. - 3
Check O-rings and collar
Remove the collar if possible; inspect the O-ring for cracks or deformation and compare to a spare ring.
Tip: Keep a few spare O-rings of the correct size. - 4
Apply penetrating spray
Lightly mist around the joint and wait a moment to loosen residues. Do not overapply near seals.
Tip: Let it dwell a moment for best effect. - 5
Gently twist with a strap wrench
Use a strap wrench or rubber-jawed pliers to apply steady, even torque; avoid aggressive force that could damage threads.
Tip: Maintain alignment to protect the seating surface. - 6
Test reassembly and seal
Reinstall a fresh O-ring if replaced, reattach the coupling, and test at low pressure for leaks before full use.
Tip: Check for leaks at the seating surface first.
Diagnosis: Fitting won't release after detaching nozzle
Possible Causes
- highDebris buildup in the collar or O-ring seat
- highWorn or torn O-ring
- mediumDamaged or nicked collar threads
- lowMineral buildup causing stiffness
Fixes
- easyClean the collar and O-ring seat; replace O-ring if worn
- easyApply penetrating spray, wait briefly, and attempt gentle twisting with a strap wrench
- hardInspect and replace the collar or entire coupling if threads are damaged
Quick Answers
What causes a pressure washer quick connect to get stuck?
Most common causes are debris buildup, worn O-rings, and damaged collars. Debris can lock the collar, while worn seals reduce the fit's integrity and cause sticking.
Most common causes are debris, worn O-rings, and a damaged collar.
Is it safe to use penetrating oil or spray on the quick connect?
A light penetrating spray is acceptable to help loosen the joint, but avoid over-application and never flood the pump cavity. Refrain from petroleum-based oils that can deteriorate seals.
A light penetrating spray is okay, but avoid heavy oils around seals.
What should I replace if the O-ring is damaged?
Replace the O-ring and inspect the seating surface and collar for wear. If the collar is damaged, consider replacing the entire coupling.
If the O-ring is damaged, replace it and inspect the collar.
Can I reuse a stuck quick connect after cleaning?
You can reuse after cleaning if the O-ring seats properly and there is no wear. If any doubt remains, replacement is safer to prevent leaks.
Try cleaning and rechecking; if still tight, replace.
When should I call a professional?
Seek professional help if you cannot safely loosen the fitting, if the unit is under warranty, or if a structural defect is suspected. Improper handling can void warranties or cause injury.
Call a pro if you can't safely loosen it or if warranty applies.
How can I prevent quick connects from sticking?
Regular cleaning, proper storage, and periodic O-ring replacement reduce sticking. Avoid harsh cleaners and ensure components are dry before reassembly.
Keep fittings clean, dry, and replace worn parts regularly.
Watch Video
Key Takeaways
- Relieve pressure before handling fittings
- Inspect O-rings and collar for wear
- Use penetrating spray and gentle torque for stubborn joints
- Replace worn seals or entire coupling when needed
- Maintain quick connects regularly to prevent sticking