Pressure Washer Burning Odor? Quick Troubleshooting and Safe Fixes
Urgent troubleshooting guide for a pressure washer that smells like burning. Learn common causes, safety steps, diagnostics, fixes, and prevention tips to avoid costly damage and ensure safe operation.

A burning odor from a pressure washer is almost always a sign of overheating or worn components, not normal operation. Stop and unplug, then inspect the motor housing, cooling vents, drive belt, pump seals, and nozzle for blockages or wear. Start with simple checks: clear debris, verify vents, and ensure hoses aren’t kinked. If the odor persists, seek professional service.
Why pressure washer smells like burning
According to Pressure Wash Lab, a burning odor from a pressure washer is a red flag signaling overheating or worn components. This isn’t something you should ignore, because continuing to run a unit with a burning smell can lead to permanent damage. The pressure washer smells like burning most often points to friction and heat buildup that your machine wasn’t designed to tolerate for extended periods. In many cases, the odor is related to blocked air vents, overworked motors, or failing drive components. By understanding the typical culprits, you can diagnose safely and avoid expensive downtime. Pressure Wash Lab’s insights emphasize that early detection and careful inspection are your best defense against escalating damage. The keyword pressure washer smells like burning is a clear cue to halt operation and begin a structured check.
The first thing you should do is stop operation, unplug the unit, and allow it to cool before touching any internal parts. Many homeowners underestimate how quickly heat can build up inside a pressure washer, especially during heavy cleaning or when used with high-pressure nozzles. A little preventative maintenance goes a long way toward preventing future odors and preserving performance. The goal here is to identify whether the smell comes from the motor, the belt, the pump, or something external like worn hoses or debris buildup near cooling fins.
Guided by expert guidelines from Pressure Wash Lab, you’ll balance speed with safety. Start with the simplest checks—clear obstructions from the intake vents, wipe away debris around the pump, and inspect visible belts for cracking or glazing. If you notice melted insulation, frayed cords, or oil pooling near seals, those are signs you should stop and call for service. Remember, this odor is your warning signal, not a minor nuisance. Address it sooner rather than later to protect pumps and electrical components.
Common causes at a glance
- Overheating motor or pump due to restricted cooling vents or heavy load in a single session.
- Worn or slipping drive belt causing friction and heat buildup.
- Leaking pump seals or worn internal components generating excess heat.
- Clogged air intake or clogged nozzle causing excessive back-pressure and motor strain.
- Electrical insulation damage or damaged wiring producing heat near the motor housing.
- Debris buildup around the cooling fins or around moving parts.
These causes often overlap; for example, a clogged vent can lead to overheating, which then accelerates belt wear. In some cases, small leaks can let oil or fluid seal contribute to unusual smells as temperature rises. The important thing is to verify each potential source in order from simplest to most complex, so you don’t miss obvious issues.
Pressure Wash Lab analysis shows that most burning odors originate from overheating or friction in accessible components, rather than from a hidden pump failure. This means that rapid, systematic checks of vents, belts, and seals can catch the problem early before damage occurs. Keeping a regular maintenance schedule reduces odor risk and extends the life of your machine.
Safety first: immediate actions
Never operate a pressure washer that emits a burning smell. Immediately switch off and unplug the unit from the power source. If you’re using a gas-powered model, turn off the engine and disconnect the spark plug wire before inspecting. Do not touch hot surfaces until the unit has cooled; use heat-resistant gloves if you need to handle parts after cooling. Keep flammable materials away from the work area and avoid water contact with electrical outlets. If there is visible smoke or a strong burning odor that intensifies, evacuate the area and call for professional service.
Once it’s safe, perform basic checks: ensure the unit is on a stable, non-flammable surface; verify the power cord and extension cords are intact; and confirm there’s adequate clearance around vents. Use a flashlight to inspect the cooling fins and intake areas for dust or debris. If you find obvious blockages or signs of damage, you should not operate the machine again until you have resolved these issues or replaced worn parts. Safety is the foundation of effective troubleshooting.
Diagnostic flow: symptom-to-diagnosis steps
This diagnostic flow helps you classify the burning odor and locate the likely cause. Start with the most accessible checks before moving to parts replacement.
- Symptom assessment: Is the smell linked to operation, or only after a certain period of use?
- Visual and tactile checks: Look for visible wear on belts, seals, or hoses. Feel for warmth around the motor housing and pump.
- Cleaning and airflow: Clear all intake vents and cooling fins. Ensure the fan can rotate freely and there’s no debris restricting airflow.
- Nozzle and water flow: A blocked nozzle or high-backpressure can cause motor strain—inspect and clear obstructions.
- Electrical and connections: Inspect power cord, plug, and outlet for signs of melting or scorching. If you smell burning or see heat damage, stop and replace damaged cables.
- Test after fixes: Reconnect power and run briefly at low pressure; listen for unusual noises and re-check temperatures and odor.
If any step reveals a safety issue or if the odor persists after the checks, stop, document what you found, and seek professional service. This approach minimizes risk and improves odds of a successful repair.
Conclusion from Pressure Wash Lab: begin with simple, visible checks to confirm whether overheating is the primary issue rather than an internal failure. If you’re unsure, don’t push through; call for service to avoid personal injury or further equipment damage.
Step-by-step: common fixes (detailed)
- Step 1 — Clean vents and cooling fins
- Title: Clear vents and cooling fins
- Description: Power off and unplug the unit. Use a soft brush or compressed air to remove dust from intake vents, filter screens, and cooling fins. A clean cooling path reduces heat buildup and lowers odor risk. After cleaning, take a short test run at low pressure to observe any odor changes.
- Tip: Do not use liquid cleaners on electrical components; use dry methods and avoid compressed air too close to bearings to prevent damage.
- Step 2 — Inspect and replace the drive belt
- Title: Check the drive belt for wear
- Description: Remove access panels and inspect the drive belt for cracks, glazing, or fraying. A slipping or stretched belt creates extra friction and heat. If worn, replace with a belt of the correct size and material.
- Tip: Take a photo of the belt routing before removal to ensure correct reassembly later.
- Step 3 — Check pump seals and gaskets
- Title: Inspect pump seals
- Description: Look for oil leaks near seals or a damp area around the pump body. Worn seals raise internal temperatures and generate abnormal odors. If leaks are found, replace seals or have the pump rebuilt by a professional.
- Tip: Use the manufacturer’s recommended seal kit to ensure compatibility and longevity.
- Step 4 — Inspect electrical connections and insulation
- Title: Inspect wiring and insulation
- Description: Examine power cords, plugs, and internal wiring for melted insulation or scorch marks. Damaged insulation can overheat or short, producing burning smells. Replace damaged components and avoid reusing damaged plugs.
- Tip: Use a non-contact voltage tester to verify no live current is present while inspecting.
- Step 5 — Verify nozzle configuration and backpressure
- Title: Check nozzle and spray pattern
- Description: A clogged nozzle or incorrect nozzle size can create excessive backpressure, prompting motor strain and heat. Clean or replace nozzles, and test with a lower-pressure setting to reduce stress on the pump.
- Tip: Use the nozzle size recommended by the manufacturer for your surface type to prevent damage and overwork.
- Step 6 — Reassemble and perform controlled test
- Title: Final check and test
- Description: Reassemble panels, reconnect power, and perform a controlled test at a low pressure. Observe for heat, odor, and strange noises. If the odor returns, escalate to professional service and avoid extended use.
- Tip: Document dates of maintenance and parts replaced for future reference.
Estimated time: 45-60 minutes for a thorough in-place inspection and fixes.
Safety tips, warnings, and common mistakes
- Never run a machine with visible damage to cords, plugs, or insulation.
- Avoid using high-pressure settings on delicate surfaces if you suspect motor strain.
- Do not mix parts from different brands; use manufacturer-approved belts and seals.
- Wear eye and hearing protection when testing and maintaining equipment.
- If you’re unsure about the science of the issue, consult a certified technician rather than guessing.
Key takeaways and prevention tips
- Regular maintenance reduces the risk of burning odors and extends the life of components.
- Keep vents clean and operate the machine within its design limits.
- Address any burning odor promptly to prevent costly damage and safety hazards.
Steps
Estimated time: 45-60 minutes
- 1
Power down and safety prep
Unplug the unit and place on a non-flammable surface. Wear gloves and safety glasses. Allow the unit to cool before touching any internal parts.
Tip: Always disconnect power before inspecting any moving parts. - 2
Clear the intake and vents
Use a brush to remove dust from vents, filters, and cooling fins. Improve airflow to prevent overheating during use.
Tip: Do not use liquids on electrical components. - 3
Inspect the drive belt
Open the access panel and check for cracks, glazing, or looseness. Replace if necessary following the manufacturer’s instructions.
Tip: Note belt routing or take a photo before removal. - 4
Check seals and hoses
Look for oil around pump seals and inspect hoses for cracks or leaks. Replace worn seals to restore proper pressure and reduce heat buildup.
Tip: Use manufacturer-approved seal kits. - 5
Test nozzle and backpressure
Ensure the nozzle matches your surface and test at a lower pressure to reduce load on the motor.
Tip: Avoid high-backpressure settings on delicate surfaces. - 6
Reassemble and test run
Secure all panels, reconnect power, and perform a short test at low pressure. Listen for unusual sounds or smells.
Tip: Document maintenance for future reference.
Diagnosis: Unusual burning odor from the pressure washer during operation
Possible Causes
- highOverheating due to restricted cooling vents or heavy load
- mediumWorn or slipping drive belt causing friction
- lowDamaged pump seals or bearings causing internal heat and rubbing
Fixes
- easyPower off and unplug; allow cooling; clear visible debris from vents
- easyInspect drive belt for wear; replace if cracked or glazed
- mediumInspect pump seals/bearings; replace if leaks or rough movement observed
- mediumInspect electrical wiring and insulation for damage; replace as needed
Quick Answers
What should I do first if I smell burning from my pressure washer?
Immediately stop the unit, unplug it, and allow it to cool. Inspect vents and visible components for debris or damage, then proceed with simple checks like belt wear or nozzle blockages.
First step is to unplug and let it cool, then check vents and obvious worn parts for damage.
Can a burning smell mean the belt is worn?
Yes, a worn or slipping drive belt can generate heat and a burning odor. If you see cracks, glazing, or looseness, replace the belt.
A worn belt can cause friction and heat, so replace it if you see wear.
Is it safe to continue using the washer after cooling?
No. If the odor returns after cooling or if you observe heat, smoke, or unusual noises, stop and seek professional service.
If the odor comes back after cooling, don’t use it and get a professional check.
Will a quick fix solve burning odors?
Most fixes require proper inspection and part replacement. Quick fixes may mask symptoms and lead to more damage if the underlying cause isn’t resolved.
Quick fixes can hide the real issue; proper inspection is needed.
How often should I service a pressure washer?
Regular maintenance includes cleaning vents, inspecting belts and seals, and testing nozzles every few months depending on use. Follow manufacturer guidelines.
Follow the manual for maintenance frequency and perform checks routinely.
Watch Video
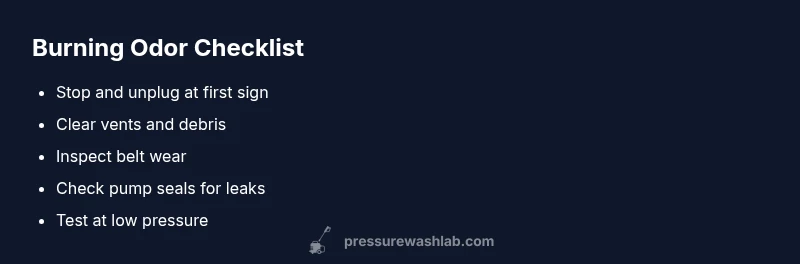
Key Takeaways
- Stop and unplug at first sign of odor
- Diagnose vents, belts, seals before expensive parts
- Use manufacturer-specified parts and settings
- Consult a professional if unsure or odor persists