Ryobi Pressure Washer No Pressure: Quick Troubleshooting Guide
Urgent, step-by-step troubleshooting for Ryobi pressure washers with no pressure. Diagnose quickly, apply safe fixes, and prevent future no-pressure failures.

Ryobi pressure washer no pressure is usually caused by an insufficient water supply or a stuck unloader valve. Start by checking the garden hose for kinks, ensure the inlet screen is clean, and confirm the pump is primed with water. If safe, switch to bypass and test different nozzle tips to restore pressure.
Why ryobi pressure washer no pressure happens
When a Ryobi pressure washer suddenly stops delivering pressure, many homeowners worry they’ve bought the wrong tool. In reality, most no pressure symptoms come from simple, checkable causes. According to Pressure Wash Lab, the two most common culprits are water supply issues and an unloader valve stuck in bypass or non-pressure mode. Before you panic, walk through a quick mental checklist: confirm you have adequate water flow, verify the inlet filter is clear, and make sure you are using the correct nozzle. Unsafe or improper testing can damage seals or the pump, so always unplug power when inspecting conduit or internals. In many Ryobi models, the pump can run without pressure if the bypass valve is misadjusted or if air is trapped in the line. The good news is that most fixes are inexpensive and reversible, and you can complete them with basic tools in under an hour. Keep a few safety steps in mind: never spray toward people, pets, or fragile surfaces, and avoid running the unit on dry priming. With the right steps, you’ll restore performance quickly.
Common causes of no-pressure with Ryobi
No-pressure symptoms in Ryobi machines are rarely a mystery when you break them into categories. The most frequent root causes are a compromised water supply, a clogged inlet filter or nozzle, an air leak in the suction line, a mis-set/unloader valve, or worn pump seals. Low water pressure or an undersized garden hose reduces pump efficiency, while a dirty inlet screen blocks flow. Pull the trigger probe and listen for a hissing sound—air in the line often manifests as reduced output. If you notice the motor runs but no spray, the issue is often the valve or filter rather than the motor.
Additionally, ensure you're using the correct nozzle tip for the task. A narrow nozzle (high-pressure tip) can build up pressure but may appear as no output if it’s blocked or partially clogged. The problem could also originate from a damaged spray wand or a failing safety relief valve. Knowing these categories helps you skim your tools without tearing the entire machine apart.
Quick checks you can do before disassembling
Before you reach for tools, perform a fast, low-risk audit:
- Inspect the water source: confirm the faucet is fully open and the hose isn’t kinked. A garden hose with a bend can dramatically reduce flow.
- Check the inlet screen and filter: remove the intake filter and rinse out any debris; a clogged filter is a leading cause of low pressure.
- Confirm the wand and nozzle are correctly seated: detach and re-seat to ensure a good seal.
- Ensure the unit is primed with water: lift the spray gun trigger to release air while supplying water to the pump.
- If your unit is gas-powered, verify the choke and fuel valve position; for electric models, confirm the outlet is delivering consistent voltage. If these quick checks don’t restore pressure, you’re likely dealing with an unloader valve issue or pump wear, which will require closer inspection.
How the unloader valve and bypass mode affect pressure
The unloader valve is a key regulator that redirects water back to the inlet when you release the trigger. If this valve sticks in bypass or fails to maintain the proper spring tension, the pump can run without developing pressure. On Ryobi models, bypassing pressure can show as a strong flow but no effective force at the nozzle. To test, switch to bypass, run the unit briefly, then snap back to spray mode and observe if pressure returns. If the valve feels sticky or hard to adjust, it may need cleaning or replacement. For many users, a simple valve adjustment and a thorough rinse restore pressure without disassembly.
Diagnostic flow basics you can follow at home
A structured approach saves time and protects components:
- Confirm water supply and priming. 2) Inspect filters and nozzles. 3) Test by bypassing to see if pressure returns. 4) Inspect the unloader valve and trigger assemble. 5) If issues persist, inspect seals and pump internals or seek professional service. This flow helps isolate whether the problem is water, valve, or pump-related.
Advanced fixes for persistent no-pressure symptoms
If basic checks fail, consider these deeper steps, but proceed with caution:
- Replace worn pump seals and pistons: diminished seal integrity leads to pressure drop and leaks. This is a moderate-difficulty task and may require specialized tools.
- Clean or replace the unloader valve: a clogged or worn valve reduces pressure and circuit efficiency. Follow the manufacturer’s service manual, keeping safety in mind.
- Inspect the crankcase/o-rings and check for internal wear: visible signs of scoring or scoring around the piston will require pump rebuild.
- Reassemble with fresh seals and lubricants, then prime and test. If pressure remains low, the unit may be beyond a DIY fix and require a professional assessment for potential pump replacement.
Always follow proper safety steps and consult the manual before disassembly. If you’re unsure, stop and contact a trained technician.
Maintenance habits to prevent no-pressure in the future
Preventive maintenance is cheaper than repairs:
- Schedule regular filter cleanings and nozzle checks.
- Inspect hoses for cracks or leaks; replace damaged sections promptly.
- Run the unit with a full water supply to keep seals lubricated.
- Lubricate moving parts as per the manual and store the unit in a dry location.
- Keep a log of your maintenance and any error codes to spot trends early.
A routine, proactive approach reduces the chance of a no-pressure incident while extending the life of your Ryobi pressure washer.
Steps
Estimated time: 60-90 minutes
- 1
Power off and safety setup
Unplug the unit from power, remove any battery or cord connectors, and put on eye protection. Gather gloves and towels to manage water spillage. Verify the area is dry and clear of bystanders. This initial safety check prevents shocks and injuries during inspection.
Tip: Always disconnect before checking electrical connections or opening the pump housing. - 2
Check water supply and inlet filter
Ensure the water faucet is fully open and the hose is free of kinks. Remove and rinse the inlet filter to remove debris that can choke flow. Reinstall and run a slow prime to force air out of the line before testing spray.
Tip: A clean filter markedly improves performance and reduces pump strain. - 3
Inspect nozzle and spray tip
Remove the nozzle and inspect for mineral buildup or blockages. Clean with warm soapy water or replace with a known-good nozzle. Reinstall and confirm correct nozzle size for your task.
Tip: Never force a stuck nozzle; replace instead of forcing a fix. - 4
Test bypass and prime the pump
Switch to bypass mode and run for 20-30 seconds to purge air. Return to spray mode and observe whether pressure returns. If not, you may have an unloader valve or pump issue.
Tip: If pressure returns briefly and then drops, air or a valve fault is likely. - 5
Inspect unloader valve
Look for signs of sticking or leakage around the unloader valve. Clean and reseat the valve; tighten fittings to spec. If the valve remains sticky, replacement may be required.
Tip: When replacing, verify the valve model matches your unit. - 6
Consider pump service or replacement
If all above steps fail, the pump seals or pistons may be worn. Consult the manual for service intervals or contact a professional for a rebuild or replacement.
Tip: Document symptoms and dates to help the technician diagnose quickly.
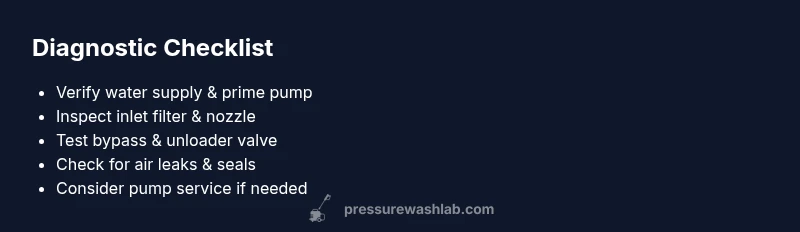
Diagnosis: Ryobi pressure washer won't produce spray pressure
Possible Causes
- highLow or no water supply
- mediumUnloader valve stuck open/closed
- highClogged inlet filter or nozzle blockage
- mediumAir leaks in intake hose or fittings
- lowWorn pump seals or damaged piston
Fixes
- easyVerify proper water supply and clean inlet screen
- easyPrime pump with water and depressurize into bypass to check valve
- mediumInspect/unloader valve and replace if necessary
- easyCheck for air leaks and replace hose clamps or o-rings
- hardInspect pump seals and replace worn parts
Quick Answers
What causes a Ryobi pressure washer to have no pressure?
Common causes include a restricted water supply, a clogged inlet filter or nozzle, an air leak in the intake, and an unloader valve misadjustment. Pump wear is possible but less frequent. Systematically testing each area helps isolate the root cause.
Typical causes for no pressure are water supply issues, filter or nozzle blockages, and unloader valve problems. Check each area in order to diagnose quickly.
Is it safe to operate in bypass mode for testing?
Yes, bypass mode is safe for testing to purge air and observe whether pressure returns. Do not spray in bypass mode for long periods and avoid pointing at people or fragile surfaces. Revert to spray mode after the test.
You can test in bypass mode briefly to purge air; just don’t spray from bypass mode and switch back to spray when testing.
Can a blocked nozzle cause no pressure?
A clogged nozzle can mimic no-pressure symptoms by restricting flow. Clean or replace the nozzle and re-test. Always use the correct nozzle for your task to avoid over-pressurization that can damage surfaces.
Yes, a blocked nozzle can look like no pressure. Clean or replace it and test again.
How do I confirm water supply is adequate?
Confirm the faucet is fully open, the hose is free of kinks, and the inlet filter is clean. If your hose is too long or the flow is restricted, reduce length or upgrade to a larger-diameter hose.
Make sure the water source is fully open and the hose isn’t kinked or blocked.
When should I replace pump seals?
Replace pump seals when you notice consistent leaks, decreased pressure with a dry or wet sound, or visible wear. A professional rebuild may be more cost-effective for older units.
If seals show wear or you lose pressure persistently, consider a seal replacement or professional service.
Watch Video
Key Takeaways
- Start with water supply and inlet filter checks
- Unloader valve is a frequent source of no pressure
- Prime the pump and test bypass before disassembly
- Replace worn seals or valves if symptoms persist
- Preventive maintenance saves costly repairs