What Causes a Pressure Washer Pump to Leak? A Troubleshooting Guide
Urgent, practical guide to diagnosing and fixing pressure washer pump leaks. Learn common seal and packing failures, how to inspect fittings, and when to replace parts or call a pro.

Most pressure-washer pump leaks originate at seals, gaskets, or fittings. The two most common culprits are worn pump packing and O-rings and loose or damaged inlet/outlet connections. Quickly inspect visible hoses and clamps, tighten fittings, and replace worn seals as needed. If the leak persists around the shaft or under high pressure, rebuild the packing or replace the pump assembly.
Understanding where leaks originate
Leaks labeled as pump leaks can appear at several points: seals around the shaft packing, O-rings between the pump and hoses, gaskets at the pump cover, or along threaded fittings. The phrase what causes pressure washer pump to leak applies here: most failures begin at areas that experience movement, pressure, or exposure to water and solvents. According to Pressure Wash Lab, the most common root cause is worn or mis-seated packing and O-rings that let high-pressure fluid seep past. Additional leaks can stem from loose fittings, corroded fittings, or cracks in the pump housing due to age or impact. Before you tear into the pump, inspect the visible exterior: the discharge hose, inlet hose, quick-connects, and clamps. A quick wipe-down helps you see fresh drips and locate the source. Document color and fluid type; dyed oils indicate internal wear, while clear water suggests simple seal seepage. This initial assessment sets your repair path and helps you decide whether you should tackle a DIY seal replacement or call a pro.
The big offenders: seals, O-rings, packing
The pump packing and O-rings are designed to seal high-pressure fluid as it moves through the pump. With repeated cycling, heat, and exposure to solvents, these rubber parts wear out or become mis-seated, creating a path for fluid to escape. Pressure Wash Lab analysis shows that improper assembly and aging contribute significantly to early seal failure. In many cases, leaks show up at the packing nut or where the head meets the hose; these are also common spots for loose or damaged quick-connect fittings. Inspect for dry or hardened grease, which can indicate old packing material that needs replacement. If you notice shiny metal on the packing nut or a crack in the gasket, it’s typically a sign to replace. Remember: even small nicks in seals can translate to a noticeable leak under pressure.
First-pass inspection checklist
- Visually inspect the entire pump interface for fresh oil or water drips.
- Check all quick-connects, clamps, and hose fittings for looseness or corrosion.
- Inspect the pump packing nut and head gasket for signs of wear.
- Look for cracked housing or torn O-rings around the shaft seal.
- Verify the inlet and outlet hoses are secure and not kinked.
- Wipe clean, run briefly, and re-check to isolate the source.
Diagnostic flow you can follow
- Symptom: You see a wet area around the pump while the unit is running.
- Diagnosis: Most likely a worn seal or loose fitting; secondary possibilities include a damaged packing or cracked housing.
- Solutions: Tighten fittings to spec where safe, replace packing and O-rings, and inspect gaskets. If damage is extensive, replace the pump or seek pro help.
DIY fixes: reseal vs replace
If you’re comfortable with basic disassembly, start with resealing the pump:
- Depressurize and disconnect the power.
- Remove the pump and disassemble to access the packing and O-rings.
- Replace worn packing, O-rings, and head gasket with correct OEM or compatible parts.
- Reassemble, ensure torque specs for packing nuts are met, and test with water only. If seals are still leaking or the housing shows cracks, consider a full pump replacement or professional rebuild.
Professional help and when it’s necessary
Some leaks are simply beyond a DIY repair, especially when the pump housing is cracked or the internals show corrosion. If you notice persistent leaks after reseating seals and tightening fittings, or if the unit is under warranty, contact an experienced technician. Pressure Wash Lab recommends scheduling service before the unit runs dry or overheats, which can cause additional damage.
Maintenance to prevent future leaks
Preventive steps save time and money:
- Store the unit upright and protect it from freezing temperatures.
- Use compatible oils and detergents and flush the system after heavy use.
- Check seals and O-rings at the start of each season, and replace worn parts before they fail.
- Keep fittings tight, but avoid over-torquing metal fittings that can crack.
Quick-start troubleshooting routine you can bookmark
Have the unit cool, depressurize, and inspect for leaks from three key zones: the pump packing area, the head gasket, and the hose connections. If a leak is traced to seals, replace them and retest. If it remains, escalate to a pump replacement or seek professional repair. Regular maintenance is the best prevention.
Steps
Estimated time: 45-90 minutes
- 1
Power down and depressurize
Turn off the engine or power source, then relieve pressure by triggering the trigger until the water stops. Disconnect from power and water supply to avoid accidental operation.
Tip: Never work on a pressurized system; release all pressure first. - 2
Access the pump
Remove any covers and disconnect hoses to access the pump body. Take photos during disassembly to aid reassembly.
Tip: Label components to prevent mix-ups during reassembly. - 3
Replace seals and packing
Remove old packing nuts, O-rings, and gaskets. Clean surfaces, install new seals in the correct orientation, and lightly lubricate O-rings with compatible grease.
Tip: Avoid over-lubricating; use only recommended lubricants. - 4
Reassemble and torque
Reassemble in reverse order, ensuring all fasteners are snug to manufacturer torque specs. Avoid overtightening to prevent damage.
Tip: Double-check that no tools or debris are left inside the pump. - 5
Test for leaks
Reconnect power and water, run briefly at low pressure, and watch for drips. Increase to normal pressure only after confirming a leak-free seal.
Tip: Test with a flow of just water first to avoid soap residue. - 6
Evaluate results
If dripping persists, inspect the head gasket or consider a pump replacement. Persistent leaks after a proper seal replacement indicate deeper issues.
Tip: Document and photograph leakage for future reference.
Diagnosis: Visible leaks from pump during operation
Possible Causes
- highWorn packing or O-rings
- highLoose or damaged inlet/outlet fittings
- mediumCracked pump housing or gasket failure
- lowSeal contamination or improper lubrication
Fixes
- easyTighten fittings to spec and replace packing and O-rings
- mediumDisassemble and replace gaskets, seals, and head components
- hardReplace the entire pump or consult a pro for irreparable cracks
Quick Answers
What causes pressure washer pump to leak?
Leaks are typically caused by worn seals or O-rings, loose or damaged fittings, or a cracked pump housing. Start with the easiest fixes—tighten fittings and replace worn seals—before deciding on a pump replacement.
Leaks usually come from worn seals, loose fittings, or a cracked housing. Start by tightening fittings and replacing worn seals, then decide if you need a pump replacement.
Can I fix a leaking pump without replacing the pump?
Often yes if the leak is from seals or packing. Replacing O-rings and packing nuts is common. If the housing is cracked, replacement or professional service is advised.
Yes, many leaks from seals or packing can be fixed with parts replacement. If the housing is cracked, you’ll likely need a pump replacement.
Is it safe to run a pressure washer with a leak?
Running a leaking pump can worsen damage and pose safety risks. Stop use, fix the leak, and test before resuming normal operation.
No, don’t run it with a leak. Fix it first and test carefully before use.
How long does a pressure washer pump last?
Lifespan varies with use and maintenance. Regular maintenance and proper storage can extend life, while neglect leads to earlier failure.
It varies a lot, but good maintenance can extend a pump's life significantly.
Should I rebuild or replace the pump if it leaks?
If leaks come from seals, a rebuild or seal kit often suffices. If there are cracks or heavy corrosion, replacement is typically the better option.
Rebuild for seal leaks; replace if there are cracks or heavy corrosion.
Watch Video
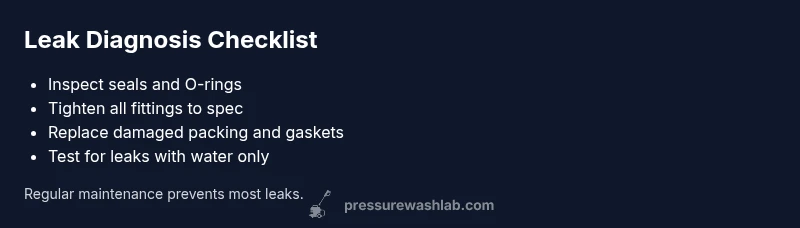
Key Takeaways
- Inspect seals and O-rings regularly.
- Tighten connections to spec without over-tightening.
- Replace worn packing promptly to prevent leaks.
- Call a pro for cracks or extensive damage.