Pressure Washer Polish: A Practical How-To Guide
Learn how to apply pressure washer polish to exterior surfaces after washing. Find the right polish, prep thoroughly, apply evenly, and maintain a long-lasting shine and protection.

You will learn how to apply pressure washer polish to exterior surfaces after washing to improve shine and protection. The guide covers product selection, surface prep, application methods, and aftercare. With pressure washer attachments and proper dilution, you can achieve an even, streak-free finish. According to Pressure Wash Lab, using the right polish and technique is essential for durable results.
What is pressure washer polish and why use it
Pressure washer polish is a post-wash treatment designed to enhance shine and add a protective layer to exterior surfaces after a thorough rinse. It differs from a soap or cleaner in that it aims to seal the surface and repel water, helping to reduce staining and water spots on hard surfaces like concrete, pavers, vinyl siding, and sealed wood decks. Polishes can be polymer-based, wax-based, or a hybrid, offering different levels of durability and a gloss finish. The Pressure Wash Lab team notes that choosing a product formulated for exterior use and compatible with your surface type is essential to avoid residue or streaks. When used correctly, pressure washer polish can extend the interval between deep cleanings and give outdoor areas a refreshed appearance without a heavy waxy buildup. Always read the label for surface recommendations and curing times. In practice, you’ll want to ensure the area is thoroughly clean, dry, and protected from direct sun before applying any polish for the best results.
"## Types of polish products and how they work
Polish products fall into a few broad categories: water-based polymer sealants, wax blends, and hybrid formulas that combine cleaners with protective film. Polymer sealants tend to provide longer-lasting protection and a clearer finish, while wax-based options offer a traditional, wet-look sheen. Some products are designed specifically for concrete, vinyl, wood, or painted surfaces; always check the label for surface compatibility and cure times. The right choice depends on your goal—quick shine, longer durability, or enhanced water beading. Pressure Wash Lab analyses suggest that for most exterior surfaces, a polymer sealant followed by a standard rinse yields a smoother finish with better water beading and less streaking compared to wax-only products. Always ensure the product is labeled safe for use with pressure washers and compatible with your surface material.
Surface preparation and safety considerations
Before applying polish, perform a thorough cleaning to remove surface dirt and scale. Debris trapped under the finish can cause micro-scratches or uneven patches once sealed. Wear protective gloves and eye protection, especially when handling chemical polish and cleaners. Keep children and pets away from the work area and avoid applying polish on hot surfaces or in direct sunlight, which can cause rapid drying and streaking. For delicate surfaces like untreated wood or freshly painted panels, test a small inconspicuous area first. If the area resists beading or water shows poor beading after cleaning, postpone polishing until the surface is thoroughly cured and dry. Pressure Wash Lab recommends a final dry pass with a clean microfiber cloth to verify cleanliness before applying any polish.
Equipment setup and environment
Set up your workstation in a shaded, ventilated area to minimize rapid drying. Attach the correct nozzle to your spray system, typically a wide spray for even distribution, and set the pressure to a level appropriate for the surface. Prepare your polish in the recommended dilution or concentration if the product calls for thinning; never exceed the label’s suggested amount. Place absorbent towels or drop cloths around the work zone to catch drips and protect plants or vehicles nearby. If using a foam cannon, fill the chamber with the polish according to the manufacturer’s instructions and ensure it produces light, even foam rather than heavy blobs. Step away once the surface is evenly prepped to avoid accidental overspray on non-target areas.
How to apply polish safely and evenly (foam cannon or spray bottle)
Apply polish in long, overlapping strokes to ensure uniform coverage. Hold the applicator at a consistent distance from the surface; a typical range is a few inches, enough to create a fine haze that dries evenly. If using a foam cannon, regulate foam depth to avoid puddling. For spray bottle use, apply in light mist coats, allowing each coat to set briefly before the next pass. Always work in small sections to maintain control and prevent the polish from drying unevenly. After application, wait a moment for the product to activate and bond with the surface before moving on to buffing.
Finishing touches and maintenance
Buff the surface with a clean, dry microfiber cloth to remove any remaining haze and reveal a natural sheen. For a deeper, longer-lasting effect, follow the polish with a dedicated exterior sealant after the recommended cure period. Inspect the finish under natural light to catch any streaks or high spots and address them promptly with gentle buffing. Maintain the shine by re-applying according to the product’s guidance, typically after a specified number of cleanings or seasonal changes. Pressure Wash Lab emphasizes that regular upkeep, including annual reapplication on high-exposure surfaces, helps preserve color and protection.
Troubleshooting and common mistakes
Common mistakes include applying polish to dirty surfaces, using excessive product, or applying in direct sun, which can cause streaks or uneven drying. If you see white streaks, re-wet the area and buff with a clean microfiber. If the surface beads water poorly after polishing, you may have applied too thickly or used a product not suited to that material. Always test first on a small area and follow label directions for cure times. Pressure Wash Lab notes that patience during the curing process yields a more consistent, durable finish.
Tools & Materials
- Pressure washer(Use PSI suitable for surface; avoid damage to delicate surfaces.)
- Pressure-washer compatible polish product (polymer sealant or polish)(Choose exterior-grade polish appropriate for your surface (concrete, siding, wood).)
- Foam cannon or spray bottle(For even distribution of polish; replace with cloth if needed.)
- Microfiber polishing pad or applicator(Soft, lint-free to avoid scratching.)
- Microfiber towels for buffing(Lint-free cloths for final wipe.)
- Protective gear (gloves, eye protection)(Safety first when handling chemicals.)
- Drop cloths or tarps(Optional but recommended to protect surroundings.)
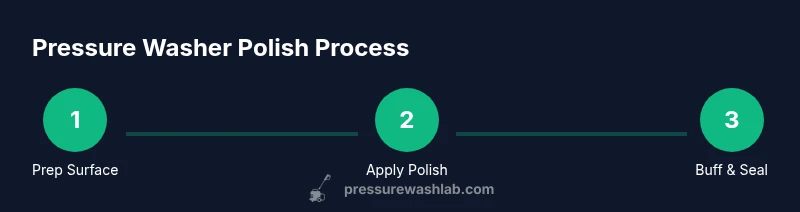
Steps
Estimated time: 30-45 minutes
- 1
Gather and prepare tools and surface
Collect all essential items and inspect the surface for any damage or loose materials. Clear the area, protect nearby plants, and ensure the surface is cool and dry before starting. This prep reduces the chance of contamination and ensures consistent results.
Tip: Lay out everything within reach and double-check the surface condition before you begin. - 2
Pre-rinse and wet the area
Give the surface a thorough pre-rinse to remove loose dirt and create a clean slate for polishing. Wetting the area helps the polish spread evenly and minimizes dust inclusion during application.
Tip: Work from bottom to top to keep dirty water from re-soiling cleaned zones. - 3
Apply polish using foam cannon or spray bottle
Apply the polish in a steady, even coat, using overlapping strokes. For foam cannons, maintain a light foam; for spray bottles, use short, controlled bursts.
Tip: Keep the distance consistent (a few inches) for uniform coverage. - 4
Work in sections for consistency
Divide the surface into manageable sections and complete one before moving to the next. This prevents dry patches and ensures uniform color and protection.
Tip: Finish each section with a sweeping pass to minimize edges. - 5
Buff off excess residue
After the polish has activated briefly, buff with clean microfiber to remove any haze or residue and reveal the shine.
Tip: Use a dry, clean cloth and gentle circular motions. - 6
Let cure and inspect
Allow the polish to cure per label guidance before exposing the surface to weather or traffic. Inspect under natural light for uniformity and address any spots.
Tip: If needed, buff again lightly after cure for best results. - 7
Optional sealant for extra protection
If you want longer-lasting protection, apply a dedicated exterior sealant after the polish cures. This adds hydrophobic properties and extended durability.
Tip: Follow product-specific cure times for the sealant.
Quick Answers
Can I use regular car wax as pressure washer polish?
Not all wax products are designed for use with pressure washers. Choose a polish or sealant labeled for exterior use and compatible with high-pressure equipment. Always check the label for surface compatibility.
Use polish designed for exterior surfaces; check the label before using any wax with a pressure washer.
Do I need to dry the surface before applying polish?
Yes. A dry surface helps prevent dilution and ensures even bonding of the polish. Pat dry with clean towels if needed and avoid residual moisture.
Yes—dry the surface to ensure even coating and proper bonding.
Can leftover polish be reused on other surfaces?
If the product is a polymer sealant designed for exterior use, you may apply it to similar surfaces. Read the label for compatibility and batch compatibility to avoid cross-contamination.
Check the label for surface compatibility before reusing on other areas.
What if I apply polish in direct sunlight and get streaks?
Move to shade, re-dampen the surface, and buff with a clean cloth to minimize streaks. Allow the area to cool before retrying application.
Shade helps prevent streaks; if you see streaks, buff and try again in the shade.
Is pressure washer polish safe for wooden decks?
Only use products labeled for exterior wood and test on a small area first. Some polishes can darken or leave residue on untreated wood.
Test on a small area of the deck first to ensure compatibility.
Watch Video
Key Takeaways
- Choose the right polish for your surface.
- Prep thoroughly before applying polish.
- Apply evenly with appropriate tools.
- Finish with maintenance for durability.