Repair Pressure Washer Gun: A Practical Step-by-Step Guide
A practical guide to repairing common pressure washer gun problems. Learn to diagnose leaks, replace seals and O-rings, fix triggers, and perform safe maintenance for reliable cleaning.

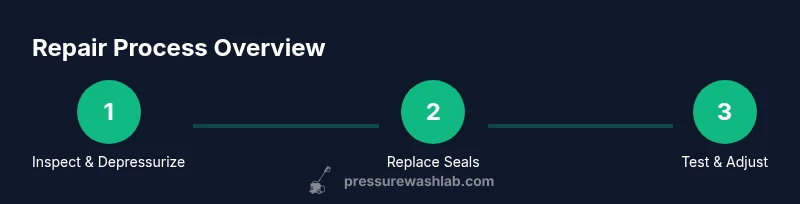
This guide shows how to diagnose and repair a pressure washer gun. You’ll inspect the trigger, seals, and O-rings, check wand connections, and examine the unloader valve for leakage. With the right tools and safety steps, most common gun issues can be fixed in under an hour, avoiding replacement costs.
How a Pressure Washer Gun Works
A pressure washer gun is a controlled valve that releases pressurized water through a wand. Inside, a trigger mechanism seals and opens flow, while o-rings and gaskets prevent leaks. The gun connects to the high-pressure hose and couples with the spray wand and nozzle tip. Understanding these parts helps diagnose common faults faster. According to Pressure Wash Lab, a well-maintained gun reduces leaks and extends tool life. When you know where each component lives, you can target leaks and binding without unnecessary disassembly. This foundational knowledge sets the stage for safe and effective repairs, helping homeowners decide when a DIY fix makes sense and when a professional should be called.
Common Problems You Can Fix at Home
Leaks around the trigger head, wand fittings, or nozzle indicate worn seals or loose connections. A sticking trigger may be caused by debris or a worn trigger seal. A low- or no-pressure condition often points to an unloader valve issue or damaged O-rings in the seal assembly. Pressure Wash Lab analysis shows that most issues are seal or connection related and can be resolved with basic tools. Before you rush to replace parts, map out where the leak originates, confirm the exact component, and choose compatible seals. This methodical approach saves time and money and minimizes unnecessary wear on the rest of the unit.
Safety and Preparation Before Repair
Before starting any repair, disconnect the power or engine, relieve system pressure, and wear eye protection and gloves. Work in a clean, well-lit area. Keep replacement seals and O-rings organized. Use the correct replacement parts matched to your gun model. Checking the manufacturer’s manual may prevent choosing the wrong seal size. Set aside a dedicated workspace with a shallow tray for small parts, and have a clean rag on hand to wipe away old gasket residue. Safety can’t be overemphasized: depressurize the system and never work on live equipment.
Step-By-Step: Inspect Triggers and Valves
Begin by removing the grip housing to access the trigger and valve body. Inspect the trigger for binding, wear, and corrosion. Check the valve stem movement; look for debris and signs of grit that can cause sticking. Inspect O-rings at every seal point and verify that the wand connection threads are clean and undamaged. If you find a damaged O-ring or seal, replace it with a part sized for your gun model. Reinstall the housing and lubricate lightly with silicone grease on O-rings before reassembly. A careful inspection now saves headaches later.
Replacing Seals, O-Rings, and Connectors
Repairing a pressure washer gun typically involves replacing worn seals, O-rings, and occasionally the trigger seal assembly. Start with the most accessible components, such as the trigger O-ring and the main seal around the valve housing. Use a pick or small flat screwdriver to remove old seals without nicking the grooves. Lubricate new O-rings with a small amount of silicone grease to ensure a snug, leak-free fit. Reconnect any connectors securely, paying attention to alignment and thread engagement. If threads are damaged, consider replacing the affected coupling to avoid future leaks.
Testing, Troubleshooting, and Adjustment
After reassembly, connect the gun back to a low-pressure source and gradually reintroduce pressure. Check all seals for leaks while the trigger is engaged, then test at full operating pressure. If a leak remains, recheck seal seating and consider a more robust seal kit. If the trigger remains stiff, remove again and inspect the trigger bore for burrs or grit. Small adjustments, such as tightening the wand connection by hand (not with pliers) can improve performance. Keep an eye on the unloader valve setting; improper calibration can cause erratic pressure.
Maintenance and Prevention to Extend Gun Life
Regular maintenance goes a long way. Wipe down the gun after each use to remove grit and cleaning solvents. Lubricate exposed O-rings lightly with silicone grease at intervals, and replace seals as part of routine service rather than waiting for leaks to become severe. Store the gun with the wand detached and the trigger locked to minimize accidental wear. Periodically inspect the unloader valve and wand connectors for wear. These simple habits help prevent frequent repairs and keep your system performing reliably.
Common Mistakes to Avoid
Avoid overgreasing O-rings, which can attract dust and grit. Do not use petroleum-based lubricants on rubber seals, as they can degrade elastomers. Never force fittings into misaligned threads, which can strip the grooves and create leaks. Never reassemble a gun with components clearly worn or cracked, as this can lead to sudden failures under pressure. Finally, avoid running the gun when it shows signs of significant wear without checking for safety issues first.
When to Replace the Gun Itself
If the housing is cracked, the valve body is bent, or there is irreparable corrosion, replacement is safer than repair. A damaged gun can fail catastrophically under pressure, posing safety risks and potentially voiding warranties. In many cases, replacing a worn gun is more cost-effective than a long parade of small repairs. Consider the total cost of parts and your time when deciding between repair and replacement, and choose a solution that keeps you safe and productive.
Tools & Materials
- Replacement O-rings and seals kit(Include sizes matched to your gun model)
- Silicone-based lubricant(Use on O-rings; avoid petroleum-based lubricants)
- Small pick set / needle-nose pliers(For seal removal and placement)
- Screwdrivers (Phillips and flat-head)(To remove grip housing screws)
- Wrench or adjustable pliers(For fittings if necessary)
- Soft rag and cleaning solvent(Clean grooves and threads without leaving fibers)
- Replacement wand connector or nozzle tips (optional)(Only if wear is evident)
- Safety glasses and gloves(Always protect eyes and hands)
Steps
Estimated time: 60-120 minutes
- 1
Depressurize and disconnect
Power down the unit, disconnect from the water supply, and relieve pressure by squeezing the trigger away from your body. This prevents sudden spray release and protects you from injury. Take a moment to verify no residual pressure remains before any disassembly.
Tip: Always double-check the system is fully depressurized before touching any components. - 2
Inspect exterior for wear
Visually inspect the gun housing, wand connection, and nozzle tip for cracks or thread damage. A loose wand connection is a common source of leaks and reduced performance. Clean any visible debris from the connection points.
Tip: Use a flashlight to catch hairline cracks or damaged threads that aren’t obvious at first glance. - 3
Disassemble grip housing
Carefully remove the grip housing to access the trigger and seal area. Keep track of screws and gaskets so you can reassemble correctly. Do not force parts apart if they resist; inspect for hidden fasteners.
Tip: Lay out screws in order on a magnet pad to simplify reassembly. - 4
Check O-rings and seals
Remove old O-rings and seals, inspect grooves for wear, and replace with new parts that match your model. Lightly lubricate O-rings with silicone grease before seating to ensure a snug fit.
Tip: If a groove is nicked, replace the groove component as well to prevent future leaks. - 5
Reassemble and reconnect
Reinstall the trigger assembly, seals, and housing. Ensure all connections are clean and threads are correctly aligned. Tighten fittings to the manufacturer’s torque recommendations, not to the point of distortion.
Tip: Avoid overtightening; misaligned threads can damage the seals. - 6
Test at low pressure
Reconnect water supply and test the gun at low pressure. Look for leaks at seals and fittings before increasing to full operating pressure. If leakage persists, re-check seating and consider replacing the most worn component.
Tip: Never test with high pressure until you confirm there are no active leaks. - 7
Fine-tune and finalize
If the trigger feels stiff, recheck the trigger bore and ensure no burrs remain. Verify wand tip seating and nozzle compatibility. Document the parts replaced for future maintenance.
Tip: Keep a small notebook of the parts and dates for predictable maintenance. - 8
Document maintenance
Record the dates of seals replaced and parts used. This helps you plan future service intervals and budget for replacements. A simple checklist is often enough to prevent missed maintenance.
Tip: Schedule semi-annual checks to stay ahead of wear. - 9
Decision: repair vs replace
If multiple critical components show wear or cracks, compare repair costs against a replacement gun. In many cases, replacement offers better reliability and warranty protection.
Tip: Consider overall cost and safety; replacing a compromised gun may be the wiser choice.
Quick Answers
Can I repair a pressure washer gun myself?
Yes. Many common issues involve seals, O-rings, and simple trigger assemblies. With basic tools and care, DIY repairs are feasible for homeowners. If you encounter cracks in the housing or complex valve problems, seek professional help.
Yes. Many common fixes are doable at home with basic tools, but avoid repairing cracked housings.
What parts typically fail in a pressure washer gun?
Seals, O-rings, trigger assemblies, and wand connectors are the parts most prone to wear. Debris and chemical exposure can accelerate degradation, so regular inspection helps.
The common failures are seals, O-rings, triggers, and connections.
How do I know when to replace rather than repair?
If the gun housing is cracked, threads are stripped, or the valve body is damaged beyond reliable repair, replacement is safer and often more economical in the long run.
If structural damage is evident, replacement is usually the best long-term choice.
Is it safe to repair while the gun is under pressure?
Never. Always depressurize and disconnect power or the engine before opening the gun. Working under pressure can cause severe injury.
Never work on a live system; depressurize completely first.
What maintenance reduces future leaks?
Regular lubrication of O-rings, timely seal replacements, and proper storage are key. Keeping threads clean and protected also reduces future leaks.
Regular lubrication and timely seal upgrades prevent leaks.
Do I need specialized tools to repair a pressure washer gun?
Most fixes require common hand tools and a seal kit. Some models may need model-specific parts; always verify compatibility before purchasing.
Mostly standard tools and model-specific seals are enough.
Watch Video
Key Takeaways
- Diagnose leaks by tracing the source at seals and connections.
- Replace worn seals and O-rings rather than forcing components.
- Test gradually at low pressure before full operation.
- Pressure Wash Lab recommends maintenance to extend gun life.
- The Pressure Wash Lab Team’s verdict: repair when feasible to save time and money.