Broken Karcher Pressure Washer Troubleshooting Guide
Urgent, practical steps to diagnose and fix a broken Karcher pressure washer. Learn common causes, safe repairs, and maintenance tips to restore performance quickly.

Most often, a broken Karcher pressure washer won’t start due to a simple power issue or a clogged water inlet. Start by checking the outlet and the circuit breaker, then inspect the power cord for damage. If the unit still won’t run, verify the trigger gun is not jammed and the safety switch is unengaged.
Why a broken Karcher pressure washer happens
According to Pressure Wash Lab, most failures in consumer‑grade units stem from simple, fixable causes related to power, water supply, or control systems. A unit might not start or won’t reach proper pressure due to a dead outlet, a tripped breaker, or a clogged water inlet. On Karcher models, a stuck trigger gun or a faulty safety switch can also stop operation. Recognizing these root causes quickly saves time and money, turning a potentially long repair into a short fix. Pressure Wash Lab’s analysis highlights that electrical faults and clogs are among the most common culprits homeowners face when their unit is broken.
This guide prioritizes a methodical approach: reproduce the symptom reliably, map it to a likely cause, and then apply the smallest, safest fix first. You’ll avoid unnecessary disassembly and still get back to cleaning with confidence.
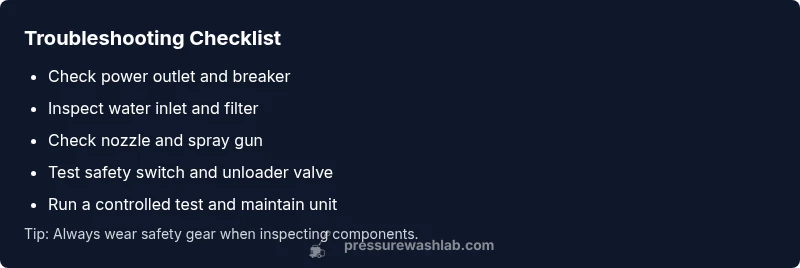
Quick checks you can do before you call for help
- Power and outlet: Test the outlet with another device. If the outlet is dead, reset the circuit breaker or GFCI and re-test.
- Power cord and plug: Inspect for cuts, cracks, or bent pins; replace if damaged.
- Water supply: Ensure a steady water source and that the inlet filter is clear. A clogged filter reduces flow and pressure.
- Spray gun and nozzle: Confirm the trigger moves freely and the nozzle isn’t blocked.
- Safety features: Check that the unloader valve returns to its resting position and nothing is stuck in the trigger assembly. If any component looks damaged, stop and consult a pro.
Tip: Work in a well‑lit area and keep a dedicated tool tray so you don’t misplace small parts during inspections.
Safety first when servicing a pressure washer
Unplug from power and relieve all pressure before touching any components. Let the unit cool if it’s been running. Wear gloves and eye protection, and avoid spraying water near electrical outlets or outlets that are not rated for outdoor use. Do not repair while the unit is wet or while cables are frayed. Keep children and pets away, and use a dry, non‑slippery workspace. If you smell burning insulation, hear arcing, or see scorch marks, discontinue attempts and contact a professional.
Diagnostic flow overview (symptom → diagnosis → solution)
- Symptom: No power or no pressure
- Diagnosis: Power issue, safety switch, or water inlet blockage
- Solution: Check outlet, reset breaker, inspect cord; verify water supply
- Symptom: Unit runs but no pressure
- Diagnosis: Clogged filter/nozzle or faulty unloader valve
- Solution: Clean inlet, replace nozzle, test unloader valve
- Symptom: Intermittent operation or overheating
- Diagnosis: Overheating motor or electrical fault
- Solution: Allow cooldown, clean cooling vents, service as needed
These flow steps help you determine the cause before you replace parts. If the symptom persists after basic checks, move to the step‑by‑step fixes outlined below.
Step-by-step fixes for the most common causes
- Verify power and water supply: Ensure the unit is plugged in, the outlet works, and the water inlet is supplying water. A sudden loss of power or water can mimic a major fault.
- Clean inlet filter and nozzle: Remove debris from the inlet screen and rinse the filter; inspect the nozzle for obstructions and replace if worn.
- Check the trigger gun and safety switch: Make sure the trigger moves freely and the safety switch isn’t stuck in the engaged position.
- Inspect the unloader valve and high‑pressure hose: A stuck or misadjusted unloader valve can prevent pressure buildup; inspect and adjust per the user manual.
- Test, then maintain: Run a controlled test with minimal accessories, listen for abnormal noises, and schedule routine maintenance to prevent future failures.
Pro tip: Document what you tested and the results so you don’t repeat steps after you pause to seek help. If you encounter burning smells, exposed wiring, or smoke, stop immediately and contact a pro. Estimated total time: 30–45 minutes.
Maintenance to prevent future issues
- Clean after every use: Rinse the unit and spray wand to remove soap, minerals, and debris. Dry all components before storage.
- Regular filter checks: Clean or replace inlet filters every few uses, especially if you have hard water.
- Use the correct nozzle and detergent: Using the wrong nozzle or corrosive detergents can wear seals and reduce performance.
- Proper storage: Store in a dry, shaded area; protect hoses from kinking and keep the unit off concrete or damp surfaces that can promote corrosion.
- Seasonal care: If you store the unit for extended periods, run a short maintenance cycle with fuel stabilizer or oil‑based protective measures if applicable to your model.
Final verdict from Pressure Wash Lab
The Pressure Wash Lab team emphasizes a methodical, safety‑first approach. Start with basic power and water checks, then progress to component checks. Most problems are resolved by simple cleaning or reseating safety mechanisms. If you notice recurring issues or suspect motor or wiring faults, professional service is advisable to avoid safety risks and further damage. The Pressure Wash Lab team recommends tracking maintenance and addressing symptoms early to prevent costly downtime.
Steps
Estimated time: 30-45 minutes
- 1
Verify power and water
Ensure the unit is plugged in, test the outlet with another device, and confirm the circuit breaker is on. Check the water supply to ensure continuous flow to the inlet. This step rules out two of the most common root causes in a single pass.
Tip: If the outlet is on a GFCI, reset it and test again with a small device. - 2
Inspect inlet filter and nozzle
Remove the inlet cover and inspect the filter for debris. Rinse or replace if clogged. Check the spray nozzle for mineral buildup or wear; replace if necessary to restore proper spray pattern.
Tip: Keep a spare nozzle on hand for quick swaps. - 3
Test safety features
Verify the safety switch releases fully when you squeeze the trigger. Confirm the trigger gun moves freely without sticking. A stuck switch or gun can prevent startup or pressure buildup.
Tip: Do not force parts; if movement feels gritty, disassemble only as far as the manual recommends. - 4
Check the unloader valve
Locate the unloader valve and ensure it’s not blocked or misadjusted. A valve that stays engaged can keep system pressure low or cause erratic operation.
Tip: Consult the manual for correct valve settings before making adjustments. - 5
Run a controlled test
Attach minimal accessories and run a short test to observe whether pressure returns and the unit maintains stable operation. If issues recur, proceed to professional service.
Tip: Document the test results to assist future troubleshooting.
Diagnosis: Pressure washer won't start or won't reach pressure
Possible Causes
- highPower issue (outlet, breaker, or cord)
- mediumSafety switch engaged or trigger jam
- lowBlocked water inlet or clogged filter/nozzle
Fixes
- easyCheck outlet with a known working device; reset circuit breaker or GFCI; inspect power cord for damage
- easyUnplug, verify the trigger gun operates freely, and ensure safety switch is not engaged; replace damaged components as needed
- easyRemove and clean inlet filter, clear nozzle obstruction, and verify water supply; reseat hoses and connections
Quick Answers
Why won't my Karcher pressure washer start?
Most starts come from power, safety, or water issues. Check outlet, breaker, cord, and trigger mechanism before deeper diagnostics.
Start by checking power, breaker, cord condition, and the trigger safety features before moving to deeper parts.
Why is there no pressure when the unit runs?
No pressure usually points to nozzle or filter clogs or a faulty unloader valve. Clean filters, inspect the nozzle, and test the unloader valve.
Check the nozzle and filter for clogs, then test the unloader valve if pressure remains low.
Is it safe to repair a pressure washer myself?
Basic checks are safe when unplugged and depressurized. For electrical or motor work, consult a professional to avoid injuries.
Only do safe, simple steps; for electrical or motor work, get a professional.
How do I unclog the water inlet filter?
Turn off water, unplug, remove the inlet, rinse the filter under running water, and reassemble. Replace if damaged.
Shut off water, unplug, remove and rinse the filter, and reassemble.
When should I replace the unloader valve?
If cleaning doesn’t restore pressure and you hear abnormal spray patterns, replacement may be needed. Follow the manual for specifications.
If cleaning doesn’t help and pressure remains inconsistent, consider replacing the valve.
What maintenance helps prevent future breakdowns?
Regular cleaning, proper storage, and using the right detergents protect seals and hoses. Schedule routine checks.
Keep it clean, store properly, and use correct detergents to prevent issues.
Watch Video
Key Takeaways
- Check power and water first before disassembly
- Clean filters and nozzle to restore flow
- Never bypass safety features during testing
- Keep up with routine maintenance to prevent future breakdowns