What Happens When Your Pressure Washer Loses Pressure: Troubleshooting Guide
Discover why your pressure washer loses pressure and how to diagnose and fix it fast. Practical steps, safety tips, and maintenance advice from Pressure Wash Lab to restore peak performance.

What happens when a pressure washer loses pressure is typically a sign of a simple maintenance issue rather than a failed motor. Common culprits include a blocked nozzle, a dirty inlet filter, a kinked hose, air leaks, or an unloader valve sticking. Start by verifying your water supply, clearing the nozzle, and inspecting the filter; if pressure remains weak, follow the diagnostic flow to pinpoint the cause.
Why Pressure Reliability Drops
What happens when a pressure washer loses pressure? It usually means the machine cannot maintain the high-velocity flow you expect, resulting in a weak spray or no spray at all. According to Pressure Wash Lab, most losses trace back to simple maintenance issues rather than major component failures. In this guide we break down the common causes, how they manifest, and what you should do now to restore performance and minimize downtime.
Several factors interact: water supply, nozzle condition, pump health, and system seals. The water source must supply clean water at adequate volume; any restriction reduces output. A worn or clogged nozzle disrupts the spray pattern and lowers PSI at the nozzle. Pump seals can wear with age, allowing air into the system and reducing efficiency. Pressure washers also lose performance if air is drawn into the line due to loose connections or cracked hoses. In the worst case, a failing unloader valve can bleed pressure permanently. Recognizing these symptoms early helps you avoid more expensive repairs. This is where proactive maintenance pays off, a philosophy Pressure Wash Lab champions in every guide.
Common Causes at a Glance
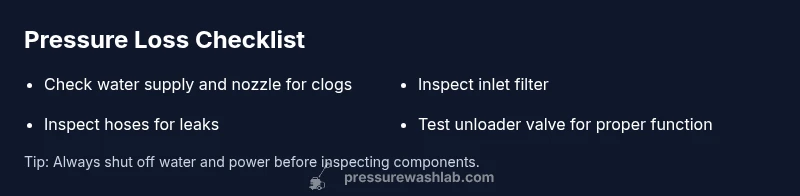
There are several typical culprits for a loss of pressure, but most fall into a short list of accelerants you can test quickly:
- Water supply and flow: a kinked hose, low water pressure from the faucet, or a partially closed valve restricts flow and reduces pressure at the wand.
- Nozzle and spray tip wear: a worn nozzle enlarges the orifice and lowers the precise pressure delivered to a surface.
- Inlet filter condition: a dirty or clogged filter starves the pump of clean water, limiting output.
- Air leaks: any loose connection, cracked hose, or grommet letting air in will reduce effective pressure.
- Unloader valve behavior: if it sticks or is misadjusted, pressure bleeds off when the trigger is released.
- Internal pump wear: seals or the piston packing degrade over time, decreasing compression.
Pressure Wash Lab’s practical takeaway: start with the simplest explanations before moving to more involved repairs.
How to Inspect Before Disassembly
Before taking apart the pump or wand, perform a quick, methodical check to identify the likely culprit. Start with the water supply and nozzle, then move to filters and hoses. If you notice any obvious cracks or loose fittings, address them first. This approach minimizes downtime and avoids unnecessary disassembly. Remember that a lot of pressure loss stems from air leaks or a blocked nozzle rather than a faulty motor.
- Confirm the water source is fully open and delivering adequate flow. If the hose has kinks or the faucet is restricted, the pump cannot build pressure.
- Inspect the spray nozzle: remove and inspect the tip for wear or clogging; try a different nozzle to compare performance.
- Check the inlet filter for debris or build-up; clean or replace as needed.
- Inspect all hoses and connections for cracks, bulges, or loose clamps that could admit air.
- Test the gun and wand for leaks or malfunction, ensuring the trigger disperses water consistently.
- If you still see pressure issues, check the unloader valve's position and function.
Quick Fixes You Can Try Today
If you’re facing a loss of pressure, there are several fixes you can attempt without specialized tools. These steps cover the most common issues and often restore normal performance quickly. If one fix doesn’t help, move to the next item in the list and document what you tested. Always follow safety precautions and disconnect power and water when making hardware changes.
- Clean or replace the nozzle and test with several tip sizes to gauge impact on pressure.
- Remove and clean the inlet water filter; replace if damaged.
- Recheck water supply and hose for kinks or restrictions; straighten the hose and ensure a continuous flow.
- Tighten fittings and clamps to eliminate air infiltration along the line.
- Inspect the unloader valve: a stuck or misadjusted valve can bleed pressure; consult the manual for proper adjustment procedures.
Pump Health: When to Repair or Replace
If basic checks and cleaning do not restore pressure, the pump itself may be the limiting factor. Signs include persistent low pressure despite a clean nozzle and filter, visible leaks at seals, or audible grinding noises when the pump runs. Pump wear accumulates over time, and seals or gaskets can deteriorate, resulting in compression loss. In these cases, a professional assessment is recommended to determine whether gasket replacement, head rebuild, or a full pump replacement is required.
Pressure Wash Lab emphasizes matching the repair to the pump’s age and usage. If the unit has seen heavy use or lacks a service history, replacement can sometimes be more cost-effective than a rebuild.
Prevention and Best Practices for Steady Pressure
The best way to handle pressure loss is to prevent it from happening in the first place. Establish a regular maintenance routine that includes inspecting the nozzle, cleaning the inlet filter, checking hoses for wear, and verifying the unloader valve operates smoothly. Replace worn parts before they fail, perform a yearly pump check, and store the equipment in a dry environment to prevent corrosion. By staying on top of maintenance, you minimize downtime and extend the life of your pressure washer.
Pressure Wash Lab recommends documenting a simple maintenance log so you can track replacements and service dates, reducing the chance of unexpected failures.
Steps
Estimated time: 60-90 minutes
- 1
Check water supply
Ensure the main supply valve is fully open and the hose is free of kinks. Verify that the water source provides a steady stream, not a trickle, as insufficient flow will prevent the pump from building pressure.
Tip: Run water through the hose by hand before attaching the wand to confirm full flow. - 2
Inspect the nozzle
Remove the nozzle and inspect the tip for wear or debris. Replace if worn; a clogged or eroded nozzle increases the orifice and reduces pressure at the spray.
Tip: Test with several nozzle sizes to gauge changes in pressure and coverage. - 3
Clean the inlet filter
Locate the inlet filter and remove any sediment. Clean with clean water or replace if damaged. A clogged filter starves the pump and lowers output.
Tip: Keep spare filters on hand to minimize downtime. - 4
Check hoses and connections
Inspect all hoses for cracks or leaks and ensure clamps are tight. Leaks introduce air that reduces effective pressure.
Tip: Use a soapy water test at joints to quickly spot small leaks. - 5
Test the unloader valve
With the wand disconnected, cycle the trigger to see if the unloader valve bleeds pressure. If it sticks or stays open, refer to the manual for proper adjustment or service.
Tip: Never force the valve; improper adjustment can cause overpressure.
Diagnosis: Pressure washer outputs weak spray or no spray when expected
Possible Causes
- highPower/water supply issue
- highClogged nozzle or spray tip
- highDirty inlet filter
- mediumAir leaks in hoses/connections
- mediumUnloader valve sticking or misadjusted
- mediumWorn pump seals or head
Fixes
- easyCheck water source, inspect faucet, and ensure adequate flow
- easyClean or replace nozzle; test with a different tip
- easyClean/replace inlet filter, verify intake is clear
- easyTighten fittings, replace damaged hoses, seal leaks
- mediumAdjust or replace unloader valve as needed
- hardConsider pump rebuild or replacement by a professional
Quick Answers
What is the first thing I should check if my pressure washer loses pressure?
Start with the water supply and nozzle. Ensure the faucet is fully open, the hose is free of kinks, and the nozzle is not clogged. If the spray remains weak, proceed with the diagnostic flow to identify the culprit.
First check the water supply and nozzle; ensure the faucet is open and the nozzle is clear, then follow the steps to diagnose the issue.
Can nozzle size affect pressure?
Yes. A larger or worn nozzle increases the orifice and can reduce pressure at the spray. Replacing with an appropriate tip often restores the intended PSI and cleaning efficiency.
Yes. A worn or too-large nozzle can lower the pressure you see at the spray. Try a different tip to compare performance.
Is a clogged inlet filter causing low pressure?
A clogged inlet filter can significantly reduce water flow to the pump, which lowers output pressure. Cleaning or replacing the filter is a quick, effective fix.
A clogged inlet filter often lowers pressure. Clean or replace it to restore proper flow.
When should I call a professional?
If basic maintenance and fixes don't restore pressure, the pump seals, head, or unloader valve may require professional service or replacement. A qualified technician can assess wear and determine the best option.
If simple fixes don’t help, it’s time to get a professional to check the pump and unloader valve.
Can air in the system cause a pressure drop?
Air leaks or trapped air can reduce effective pressure. Inspect fittings, hoses, and connections for leaks and inflate air pockets out by releasing and re-pressurizing the system.
Air leaks can cut pressure. Check all connections and re-pressurize after tightening.
Watch Video
Key Takeaways
- Verify water supply and nozzle first when pressure drops
- Clean filters and inspect hoses to stop air leaks
- Test with different tips to gauge impact on pressure
- Pressure loss is often fixable with routine maintenance, per Pressure Wash Lab